
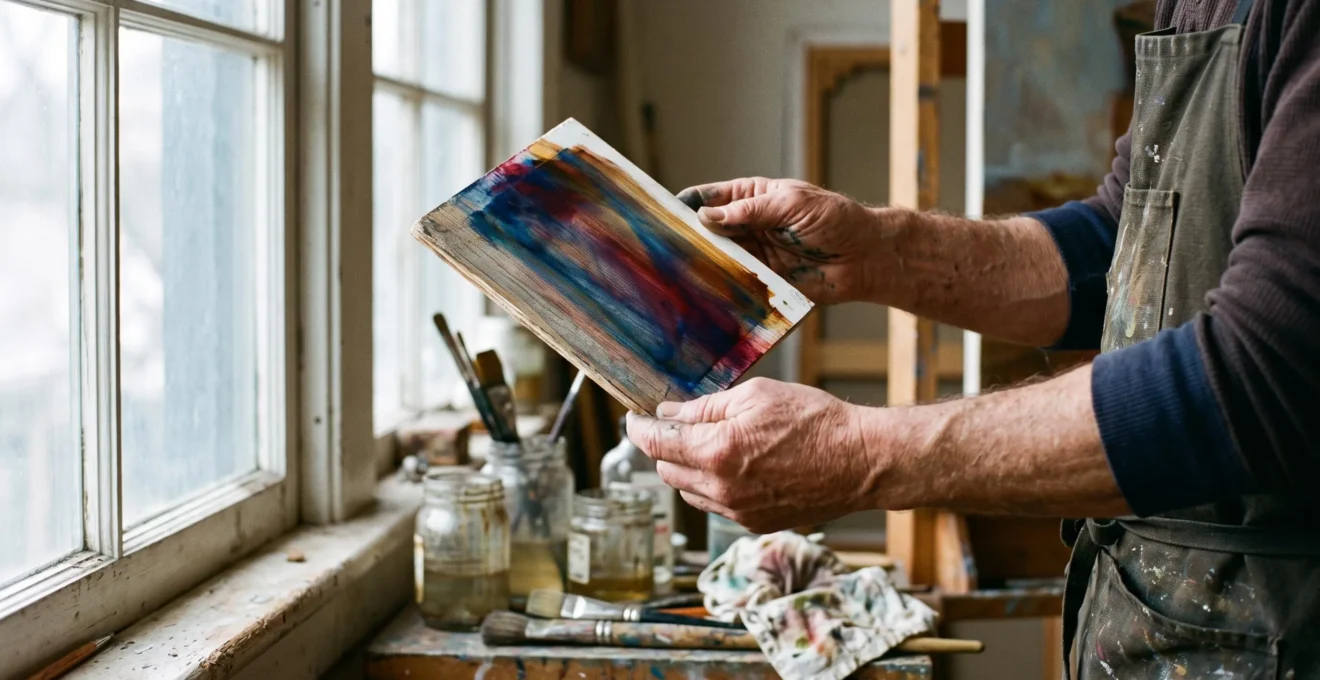
Transparent oil glazes create luminous complexity by allowing light to penetrate successive colored paint films, interact with the layers beneath, and return to the viewer with altered color and intensity. Unlike a single opaque mixture, which largely determines its appearance at the surface, a glazed passage preserves the optical contribution of its underpainting.
For painters seeking the deep reds of Flemish portraits, the warm shadows of Venetian flesh painting, or the almost imperceptible transitions associated with Leonardo da Vinci, the advantage is not simply greater saturation. It is control over how color, value, and underlying form interact through successive layers.
That control depends on disciplined construction. Transparent pigments must be selected appropriately, the ground must support the intended light effect, each paint film must remain sufficiently thin, and the next application must respect the drying behavior of the previous one. A visually beautiful glaze can still become a conservation problem if its medium or layer sequence is poorly chosen.
The essential technique is therefore both optical and structural: develop the form beneath the glaze, modify it gradually with transparent color, and protect the resulting depth through compatible materials and adequate drying time.
Transparent Oil Glazing: The Essential Principles
- Optical depth: Transparent layers filter light interacting with lighter underlying paint, producing color relationships that differ from those of a single opaque mixture.
- Durable construction: Thin, adequately bound glazes applied over sufficiently dry paint, with a compatible fat-over-lean progression, reduce avoidable film defects.
- Controlled luminosity: Ground color, pigment transparency, glaze thickness, and drying intervals determine whether the result appears jewel-like, warmly atmospheric, or muddy.
- Why Do Glazed Paintings Glow From Within While Opaque Paintings Look Flat?
- How Do You Create Glaze Medium That Remains Crystal-Clear After 50 Years?
- Flemish Precision vs Venetian Warmth: Which Glazing System Creates Jewel-Like Versus Golden Tones?
- The Layer Order Mistake That Destroys Glazing’s Optical Magic
- The Waiting Game: How Long Between Glaze Layers to Preserve Optical Clarity
- Why Does Achieving Leonardo’s Sfumato Take 40+ Layers of Transparent Paint?
- Why Do Paintings That Violate Fat-Over-Lean Crack Within 5 Years?
- Which Oil Painting Layering Sequences Prevent the Cracking That Ruins Many Amateur Works?
Why Do Glazed Paintings Glow From Within While Opaque Paintings Look Flat?
Glazed paintings can appear to glow from within because transparent colored films allow some light to reach lighter paint beneath them and return through those films to the viewer. Opaque paint scatters and reflects more light near the surface. Neither method is inherently superior, but transparent glazing offers a distinctive form of layered optical depth.
Imagine a transparent crimson glaze applied over a pale, carefully modeled underpainting. Incoming light encounters the colored film, where some wavelengths are preferentially absorbed. Some remaining light reaches the underpainting, interacts with its pigments, and travels outward through the glaze. The resulting color depends on both layers, not merely on the crimson pigment alone.
As additional transparent films are introduced, each modifies the spectrum transmitted through the existing stack. This is primarily subtractive optical filtering, not additive light mixing. Glazing can therefore establish rich color relationships without requiring every pigment to be blended together on the palette.
A single opaque mixture containing substantial white pigment behaves differently. White increases scattering and generally raises opacity, which can reduce the chromatic depth achievable through a transparent color over a light underlayer. However, skillfully handled opaque paint can still look luminous, and excessive glazing can darken or dull the result.
The National Gallery’s glossary entry on glazes explains that transparent glazes modify underlying colors without completely concealing them. It also describes how differences in glaze thickness can create tonal variation and an illusion of relief.
A bright ground is particularly effective when the painter wants pronounced color saturation. White gesso or a light-valued opaque underpainting can return more light through the glaze, whereas a dark imprimatura absorbs more light and generally produces a more subdued effect.
The foundation need not be uniformly white. A pale warm ground can contribute to the resulting hue, and strategically reserved light passages can create luminosity within a predominantly dark composition.
Studio Comparison: One Color, Two Painting Methods
For a hypothetical workshop demonstration, prepare two equally primed small panels and draw the same folded fabric motif on each. Paint the first using direct opaque mixtures of red, blue, and white. On the second, establish equivalent light and shadow values with a light opaque underpainting, allow it to dry adequately, and add thin transparent color.
Compare the panels under identical illumination. Record hue, apparent saturation, shadow readability, and the visibility of the underlying modeling. This is a repeatable learning exercise, not evidence that glazing will outperform opaque painting in every application.
The most revealing comparison is often in the half-tones. Transparent color can preserve delicate changes in value beneath its surface, producing a continuous transition between light and shadow without repeatedly remixing opaque colors.
Once that optical relationship is understood, the next challenge is choosing a medium that preserves transparency without compromising the paint film’s long-term stability.
How Do You Create Glaze Medium That Remains Crystal-Clear After 50 Years?
No homemade glazing medium can be guaranteed to remain crystal-clear for 50 years. Long-term clarity depends on its binder, additives, pigment, film thickness, environment, and aging behavior. The more defensible approach is to use a stable, adequately binding formulation, avoid unnecessary resin and drier additions, and test its handling before incorporating it into a painting.
Traditional glazing formulas often combine drying oil, solvent, and sometimes resin. These ingredients perform different functions, and none should be added merely because a historical recipe includes it.
- Binder: Drying oil forms the continuous film that holds pigment particles together and adheres the glaze to the underlying paint.
- Solvent: A compatible solvent temporarily adjusts flow and viscosity. It evaporates rather than functioning as the permanent binding component.
- Resin: Certain resins modify gloss, flow, and optical appearance, but their inclusion can introduce aging and compatibility concerns.
A practical starting point is a commercially formulated oil-painting medium with documented instructions and compatibility information. A simple glaze made with transparent oil paint and a modest addition of an appropriate drying oil or manufacturer-recommended medium is easier to evaluate than an elaborate mixture of resins, solvents, and metallic driers.
Early painting stages are commonly kept relatively lean, while later layers are adjusted to maintain a compatible fat-over-lean progression. However, increasing the amount of oil indiscriminately is not desirable. Every layer should remain thin, adequately pigmented, and structurally sound.
Natural resins such as dammar may produce attractive initial gloss but can yellow or become brittle with age. Excessive drier additions can also alter normal film formation and durability. Thick oil-resin applications may wrinkle or remain soft beneath a hardened surface.
The Canadian Conservation Institute’s guidance on caring for paintings explains the complex drying and aging behavior of oil paint, including the influence of binders, additives, pigments, and film thickness. Its conservation guidance also identifies risks associated with natural resins and inappropriate drying behavior.
Linseed oil typically forms a durable film but may yellow as it ages. Heat-bodied stand oil offers different handling and leveling properties, yet it should not be treated as permanently non-yellowing. Historical atelier recipes and claims of exceptional clarity should be considered formulations to investigate, not verified promises of multi-decade performance.
Before adopting a candidate medium, prepare separate scrap panels using the same ground and transparent pigment. Apply equally thin films with the proposed medium and with a simple oil-based control. Record initial gloss, handling, tack development, visible defects, and clarity over subsequent weeks.
Such a comparison can reveal immediate incompatibilities or handling problems, but it cannot simulate 50 years of natural aging. Long-term expectations should rely on documented material behavior rather than the appearance of a recently dried test.
With the medium chosen, the painter can turn to a more expressive decision: whether to build color over a bright foundation or incorporate warmth into the structure from the beginning.
Flemish Precision vs Venetian Warmth: Which Glazing System Creates Jewel-Like Versus Golden Tones?
A Flemish-inspired glazing system is a useful choice for crisp modeling and saturated jewel-like color over a luminous underpainting. A Venetian-inspired approach is often more suitable for warm flesh, golden drapery, and atmospheric transitions. These are practical stylistic distinctions, however, rather than rigid historical formulas followed by every painter in either tradition.
In a Flemish-inspired studio sequence, the painter may begin with a smooth light ground, develop precise drawing and tonal modeling, and introduce transparent color only after the underlying forms are established. This separates the problems of value and hue, allowing highly controlled local color.
A Venetian-inspired reconstruction can begin with a warm imprimatura and develop form through a combination of opaque, semi-opaque, and transparent passages. Earth-colored preparation and warm middle tones can influence subsequent layers, encouraging a unified golden atmosphere.
Historical practice was considerably more variable than this convenient distinction suggests. The National Gallery‘s technical research on Titian documents changes in his use of imprimatura, evidence of preparatory drawing, and compositional alterations revealed by technical examination. His methods cannot be reduced to a single warm-ground recipe.
The ground has a decisive optical role. A pale reflective foundation often increases the apparent brightness of a transparent color, while a warm ground introduces an existing color bias. Warm preparation can reduce the amount of additional color adjustment needed for a particular painting, although it does not automatically reduce the number of glaze layers.
The following comparison describes useful contemporary working strategies, not universal rules about historical schools.
| Decision factor | Flemish-inspired system | Venetian-inspired system |
|---|---|---|
| Ground | Light, smooth foundation with strongly controlled underpainting | Often warm-toned preparation integrated into the color structure |
| Desired effect | Precise detail, clear saturated hues, jewel-like passages | Warm luminosity, integrated flesh tones, atmospheric color |
| Color development | Defined modeling followed by transparent color adjustments | Flexible interaction between opaque painting and transparent finishing layers |
| Suitable subjects | Detailed portraits, reflective objects, richly colored fabrics | Flesh, warm interiors, broad drapery, atmospheric scenes |
| Studio workflow | Careful preparatory drawing and multiple controlled sessions | Broader handling with selective glazing after intermediate passages dry |
For a small jewel-toned still life, a bright underpainting may provide more control over sharp highlights and translucent shadows. For a portrait illuminated by warm reflected light, an ochre preparation may establish useful color unity before detailed modeling begins.
Neither approach should be selected solely because of historical reputation. The best ground is the one that provides the correct underlying value and hue for the intended final color.
Whatever the selected tradition, the sequence of opaque and transparent layers matters as much as their individual colors. Incorrect ordering can erase the optical effect before the painting is complete.
The Layer Order Mistake That Destroys Glazing’s Optical Magic
The most damaging glazing-sequence mistake is treating transparent paint as an unrestricted finishing correction. A lean, fast-hardening glaze over an inadequately dried, oil-rich layer can create structural problems, while an opaque correction inserted into a transparent passage can interrupt its optical depth. Successful glazing requires both sound layer compatibility and deliberate control of opacity.
Consider a carefully modeled light passage covered by two transparent red glazes. Its underlying highlights remain visible because light can interact with the paint beneath. If the painter then covers the passage with a dense opaque brown correction, the original transparent relationship is interrupted.
Further glazes over that brown may modify its surface color, but they cannot make the concealed highlights optically reappear. The correction must instead be reconsidered at the underpainting level.
This is why the opaque-to-transparent progression is a useful planning strategy for many indirect paintings, even though experienced painters may deliberately alternate opaque and transparent passages. An opaque layer is not inherently wrong; it simply changes which underlying layers remain optically active.
The structural mistake is different. A fresh, fast-drying or excessively solvent-thinned glaze can behave poorly over a softer underlayer. Inadequate binding, differential film movement, and premature overpainting can contribute to adhesion defects, wrinkling, or eventual cracking.
There is no requirement that every transparent layer be leaner than the one beneath it. In conventional oil painting, successive layers should follow a compatible fat-over-lean progression and be allowed to dry sufficiently before being overpainted.
When an error appears during glazing, the response depends on whether the film is wet or already dry:
- If a fresh glaze is too dark, gently remove or redistribute it while workable, without disturbing the underlying paint.
- If the glaze beads or retracts, stop applying additional paint and investigate the surface condition, contamination, and medium compatibility.
- If an underlying opaque value is incorrect, allow the current passage to reach an appropriate state before making a compatible correction.
- After the corrected passage has dried adequately, re-establish the transparent color only where it contributes to the intended effect.
Beading alone is not proof that the underlying paint remains uncured; surface contamination and wetting characteristics can also cause it. Likewise, localized dullness or sinkage is a diagnostic clue rather than a definitive explanation of film failure.
Planning the layers before painting makes these decisions easier. A simple notation identifying the intended ground, opaque modeling, transparent color passages, and final accents helps prevent corrections from becoming an uncontrolled accumulation of paint.
Correct ordering establishes the potential for optical depth, but appropriate drying intervals determine whether the next layer can be added without disturbing the structure already established.
The Waiting Game: How Long Between Glaze Layers to Preserve Optical Clarity
The safe interval between oil glazes varies from days to weeks or longer, depending on pigment, binder, additives, film thickness, and environmental conditions. A new glaze should generally be applied only when the preceding layer is sufficiently dry, stable, and non-tacky. Touch-dry paint is not necessarily fully cured, so elapsed time alone is an unreliable guide.
Oil paint hardens principally through oxidative polymerization. Oxygen participates in chemical reactions that gradually form a more interconnected binder film. Solvent evaporation may occur earlier, but it is not equivalent to the completion of oil-paint curing.
The drying characteristics of pigments vary substantially. Some earth pigments, including certain umbers, can accelerate drying, while other pigments or formulations may retard it. Added oils, driers, and resin-containing media further change the behavior of the film.
Temperature, airflow, moisture exposure, and application thickness can also affect practical waiting times. A very thin transparent passage may become suitable for subsequent work sooner than a thick opaque underpainting, but visible dryness does not establish that all chemical changes have finished.
A cautious studio assessment starts with visual inspection. The layer should have no visibly wet areas, developing wrinkles, unexpected lifting, or persistent localized softness. At a sacrificial test edge, a gentle tack assessment may help identify whether the film remains sticky. Avoid pressing directly into delicate painted passages or treating touch as a definitive test of complete cure.
The Canadian Conservation Institute distinguishes initial drying from the much longer process of paint-film polymerization. Its discussion of a general minimum period of six months for polymerization must not be interpreted as a mandatory six-month wait between every glaze. Heavy paint applications can require considerably longer to dry.
A useful studio habit is to make a companion test strip with the same pigment and medium as the painting. The strip can be examined without repeatedly touching the artwork, and observations can be recorded alongside the date of application.
When drying appears uneven or unexpectedly prolonged, waiting is preferable to attempting to force the process with additional driers or heat. The latter can introduce other problems without ensuring uniform hardening throughout the film.
Working on several panels in rotation also makes the process less frustrating. One painting can develop while another dries, allowing the artist to maintain productive studio sessions without compressing the required intervals.
The relevant distinction is between being ready for cautious overpainting and being completely cured. The latter can take much longer, and neither condition can be established precisely from a calendar or fingertip test alone.
Once drying intervals become part of the painter’s workflow, very gradual transitions become practical, including the exceptionally soft modeling associated with Leonardo’s sfumato.
Why Does Achieving Leonardo’s Sfumato Take 40+ Layers of Transparent Paint?
Leonardo da Vinci’s sfumato does not have a scientifically established requirement of 40 or more transparent layers. Its extraordinary softness comes from subtle tonal transitions, carefully controlled edges, and gradual applications of paint. Numerous thin layers can help achieve this effect, but the appropriate number depends on the passage and technique rather than a fixed historical formula.
Sfumato describes the visual dissolution of hard boundaries between light and shadow. Instead of defining a cheek, jawline, or atmospheric contour with an abrupt edge, the painter allows neighboring values and colors to merge gradually.
Transparent glazing provides one means of achieving that transition. Each carefully applied veil can modify a small portion of the existing tonal structure without completely concealing earlier modeling. Repeated adjustments can produce a subtle gradient that would be difficult to control through a single application.
The process is not a simple accumulation of identical glazes. Each pass may differ in pigment concentration, thickness, placement, or color temperature. The painter must continually compare the developing transition with the intended form.
Scientific research offers a more reliable foundation than traditional claims about exact layer counts. A 2010 study, the scientific study of Leonardo’s sfumato using X-ray fluorescence, examined seven paintings attributed to Leonardo’s hand and revealed complex, varied paint-layer structures associated with his facial modeling.
The investigation supports the importance of layered applications but does not establish that every sfumato passage required at least 40 transparent coats. Counts presented as universal requirements exceed what that evidence demonstrates.
7 paintings
Number of Leonardo paintings examined in the 2010 X-ray fluorescence investigation. The research identified diversity in his painting methods rather than one fixed number of glaze layers.
Laurence de Viguerie and colleagues, Angewandte Chemie International Edition, 2010.
For a contemporary painter, the more useful lesson is to divide a difficult tonal transition into manageable adjustments. A small shadow beneath the lower lip might need only a few carefully controlled applications. A broad atmospheric transition may demand more extensive refinement, although no universal relationship between area and layer count has been established.
Glazing and sfumato are related but distinct. Glazing controls the optical interaction of layered color, while sfumato concerns the visual softness of transitions and contours. Sfumato can involve transparent layers, delicate opaque handling, or combinations of techniques.
Too many dark or strongly colored glazes can gradually reduce reflected light, causing previously luminous passages to become dull or brown-gray. The painter should stop when the desired transition is achieved, not when a predetermined layer count has been reached.
Such precision is only worthwhile when the underlying paint structure remains sound. Every additional application must therefore respect the mechanical behavior of the entire painting.
Why Do Paintings That Violate Fat-Over-Lean Crack Within 5 Years?
Paintings that violate the fat-over-lean principle may crack because differently formulated oil layers dry, harden, and respond to movement at incompatible rates. However, cracking is not inevitable, and there is no established universal five-year deadline. Damage may appear earlier, much later, or not at all, depending on the materials, support, environment, and construction.
The conventional fat-over-lean principle calls for successive oil-paint layers to remain compatible as their binders oxidize and polymerize. Earlier stages are generally kept relatively lean, while later layers may contain progressively greater proportions of oil or otherwise be formulated to avoid incompatible hardening behavior.
The underlying principle is not simply that more oil always means a better upper layer. The aim is to avoid constructing a paint stack in which upper films harden or contract in ways that place excessive stress on softer layers beneath them.
Cracking can arise when differential shrinkage, brittleness, movement, or poor adhesion exceeds what the film can tolerate. Wrinkling is another possible symptom when the surface hardens while material beneath remains insufficiently set.
The behavior of any particular layer also depends on the paint formulation. Pigment oil absorption, drying-oil chemistry, paint thickness, and the presence of additives all influence the final structure. A nominal oil-to-solvent ratio alone does not fully characterize a paint film.
Glazing creates a particular challenge because thin transparent applications may contain relatively high proportions of binding medium. Adding repeated oil-rich films over unstable or inadequately dried passages does not correct defects in the underlying construction.
Conversely, applying an excessively solvent-thinned glaze can leave insufficient binder for the pigment, depending on the original paint and degree of dilution. Such a layer may be weak even if it feels dry relatively quickly.
Strong drier additions are not a dependable substitute for correct layering. Accelerating surface hardening does not necessarily produce a uniformly stable paint film.
To audit an existing painting process, record the medium, pigment, approximate paint thickness, and drying condition of every stage. Pay particular attention to abrupt formulation changes, solvent-heavy mixtures, unusually oily glazes, and upper layers that may harden significantly faster than the material below.
Support stability is another important factor. A flexible canvas can respond to changes in tension and environmental conditions, creating mechanical stresses that a more dimensionally stable rigid support may reduce. Neither type guarantees freedom from damage.
Fat-over-lean is therefore a useful preventive principle, not a prediction that incorrectly constructed paintings will fail after a particular number of years.
The best protection is to incorporate these considerations into a complete painting sequence, rather than trying to solve structural problems after they become visible.
Key Takeaways Before Building a Glazed Painting
- Choose the ground for the intended final color: luminous white passages and warm-toned foundations produce different optical starting points.
- Evaluate each new layer as part of the entire structure, considering transparency, binding, thickness, drying behavior, and support stability.
- Separate painting time from drying time. Plan additional panels or unrelated studio tasks instead of relying on aggressive driers or premature overpainting.
Which Oil Painting Layering Sequences Prevent the Cracking That Ruins Many Amateur Works?
A reliable traditional glazing sequence begins with a suitably prepared, stable support, continues through lean opaque modeling, and develops color with thin, compatible transparent layers applied after adequate drying. Final varnishing should follow the paint and varnish manufacturers’ curing guidance. This approach reduces avoidable cracking risks, although no sequence can guarantee permanent freedom from deterioration.
The frequently repeated claim that a particular percentage of amateur paintings are ruined by cracking is not substantiated by the conservation evidence considered here. What can be established is that incorrect layer construction, inadequate drying, unstable supports, and unsuitable materials can contribute to premature deterioration.
For a small, detailed oil painting, a practical indirect sequence can begin with a rigid, properly prepared panel. A smooth light ground allows the painter to preserve bright passages that will later contribute to the optical effects of glazing.
A thin tonal drawing or grisaille then establishes the major value relationships. If an imprimatura is used, its value and color should serve the final image rather than simply imitate a historical convention.
Once the opaque underpainting is sufficiently dry, transparent color can be introduced using compatible pigments and medium. Thin applications preserve the value structure and reduce unnecessary accumulation of oil-rich material.
Later glaze layers should remain compatible with the preceding paint films, respecting the fat-over-lean principle while avoiding excessive medium. Any final opaque highlights or adjustments must likewise be made with attention to drying and formulation.
After the painting is complete, final varnishing requires separate consideration. A paint film may feel dry long before it is adequately cured for a particular varnish. Traditional final varnishes and products specifically formulated for earlier application can have different requirements, so a universal varnishing interval should not be assumed.
Five-Action Checklist for a Durable Glazing Sequence
- Prepare and document the support. Choose a stable, properly prepared panel and record its ground type, color, and surface condition. Deliverable: a support and preparation note.
- Plan the layer structure. Sketch the sequence from tonal underpainting through transparent glazes and final corrections, noting the intended medium at each stage. Deliverable: a numbered layer plan.
- Test the glaze formulation. Apply the chosen transparent pigment and medium to a companion test strip and note handling, film thickness, tack development, and visible defects. Deliverable: a labeled material-test strip.
- Verify readiness before overpainting. Inspect the existing layer for tack, wrinkling, instability, and unexpected surface changes; record the observation before applying another glaze. Deliverable: a dated drying and inspection log.
- Review finishing compatibility. Check that successive paint films remain appropriately formulated and that the selected final varnish is compatible with the painting’s curing condition. Deliverable: a completed layer and finishing checklist.
A realistic project schedule can alternate between underpainting, drying, glazing, inspection, and final adjustments across several sessions. Maintaining additional prepared panels allows the artist to work consistently without repeatedly disturbing a newly applied film.
The fundamental rule is to preserve both kinds of continuity: optical continuity, so each glaze contributes to the intended color structure, and physical continuity, so each layer remains compatible with the painting beneath it.
Begin with one small test panel, a limited transparent palette, and a written layer plan. Build the values first, apply the thinnest effective glazes, record their drying behavior, and stop when the intended luminosity is achieved. This disciplined process turns glazing from an uncertain finishing effect into a controllable painting method.
Can transparent oil glazes be applied over acrylic underpainting?
Oil paint can be applied over suitable, thoroughly dry acrylic grounds or underpainting when the materials are intended to be compatible. The acrylic film should provide adequate adhesion, and the manufacturer’s instructions should be followed. Acrylic paint should not be applied over an oil-paint layer as part of a conventional layered painting sequence.
What is the difference between glazing and scumbling?
Glazing uses transparent or translucent paint to modify the color beneath it without completely hiding the underlying passage. Scumbling generally applies a lighter, often semi-opaque film over darker paint, producing a different kind of optical interaction. Both methods can contribute to atmospheric effects, but glazing relies more directly on the transmission of light through the colored film.
Which oil-paint pigments are suitable for transparent glazing?
Pigments sold in transparent or semi-transparent formulations are useful candidates. Examples include certain transparent iron oxides, quinacridone colors, and suitable transparent organic pigments. Transparency varies by pigment, manufacturer, and formulation, so consult product information and test each paint as a thin application over a light and dark ground. Also check lightfastness and permanence ratings before using a pigment in a lasting artwork.
Can a painting become too dark after repeated glazing?
Yes. Every colored glaze changes the light transmitted through and returned from the underlying paint. As absorbing layers accumulate, the passage may become progressively darker or less chromatically distinct. Use thin applications, compare the painting in consistent lighting, and stop adding color when further glazing would obscure the intended values.
Does a dry-to-the-touch glaze mean the painting is ready for final varnish?
No. Dry-to-the-touch oil paint may still be undergoing substantial oxidative curing. The required waiting period depends on paint thickness, binder, pigments, environmental conditions, and the selected varnish. Follow the varnish manufacturer’s specific application guidance and do not assume that a surface ready for cautious overpainting is also ready for traditional final varnishing.