
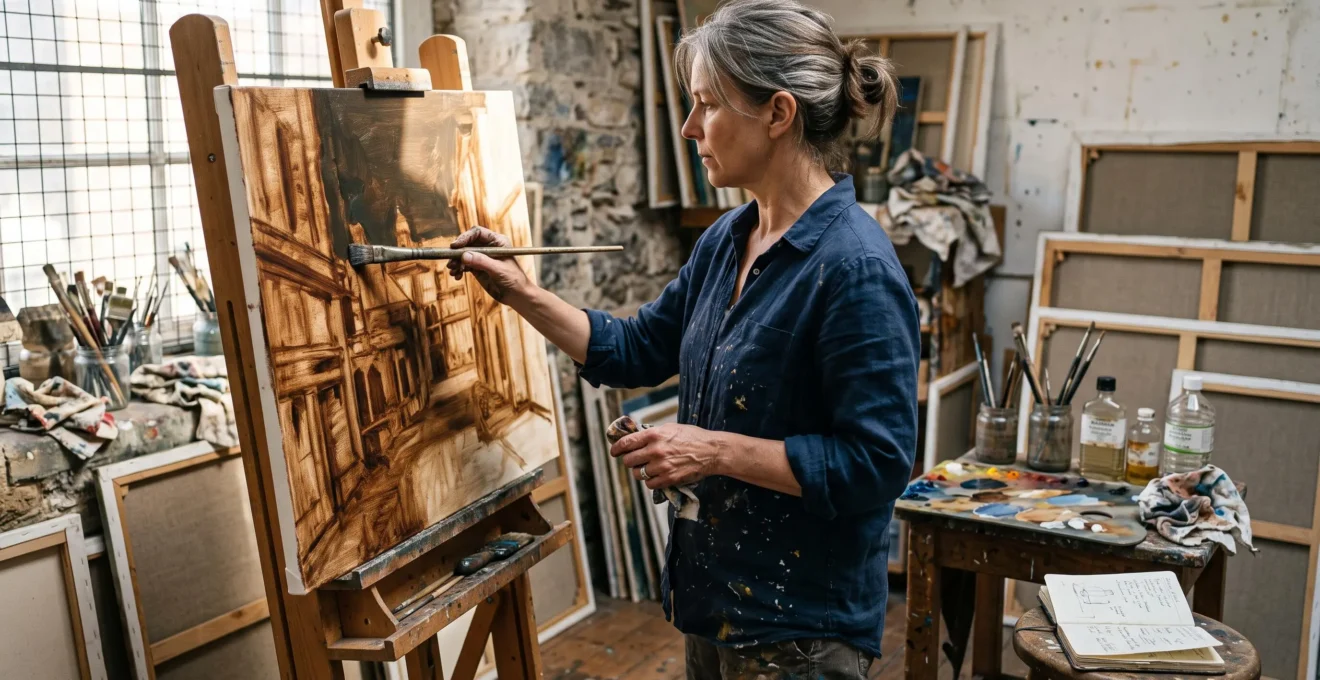
An oil painting can look perfectly finished while its internal layers are still developing stresses that may eventually produce cracks, wrinkling or paint loss. Preventing these failures requires more than following a traditional instruction to paint fat over lean. Each successive layer must be compatible with the film beneath it in oil content, flexibility, thickness and drying behavior.
The most dependable general sequence begins with a properly prepared ground, proceeds through relatively thin and structurally sound underpainting, and builds toward upper layers that remain compatible with the lower films. Transparent glazes, when required, follow only after the preceding paint is sufficiently stable.
Drying times cannot be reduced to one universal schedule. Pigment formulation, binding oil, added medium, temperature and paint thickness all affect when another layer can safely be applied.
The frequently repeated claim that cracking ruins 60% of amateur oil paintings is not established by the conservation sources used here. The practical objective is therefore not to promise a numerical reduction in failures, but to identify controllable risks and build a painting whose materials can age together.
Oil painting layering: the essential durability rules
- Build from appropriately lean, thin and adequately dried lower layers toward compatible upper layers, without treating added oil as an automatic safeguard.
- Track paint formulations, medium additions and drying behavior; surface dryness alone does not prove that an underlying film has fully cured.
- Apply transparent glazes in restrained, continuous films over stable paint, and avoid repeatedly placing fast-hardening layers over softer underpainting.
- Why Do Paintings That Violate Fat-Over-Lean Crack Within a Few Years?
- How Do You Ensure Each Paint Layer Has More Oil Than the One Below It?
- Alkyd vs Linseed Oil: Which Medium Lets You Layer Faster Without Cracking Risk?
- The Lean-Over-Fat Disaster: What Happens When Top Layers Crack and Detach From Flexible Underpainting
- The Drying Window: How Long to Wait So New Layers Bond Without Disturbing Old Ones
- Why Do Paintings From 1950 Show More Colour Loss Than Works From 1550?
- Why Do Glazed Paintings Glow From Within While Opaque Paintings Look Flat?
- How Do Transparent Glazes Create Glowing Complexity Impossible With Single Paint Coats?
Why Do Paintings That Violate Fat-Over-Lean Crack Within a Few Years?
Oil paintings may crack when adjacent layers develop different rates of hardening, shrinkage and mechanical movement. A rigid upper film can fracture if the material beneath remains soft or continues to move. Violating fat-over-lean increases this risk, but it does not establish that cracking will occur within a particular number of years.
Oil paint hardens mainly through oxidative reactions that progressively form a cross-linked polymer network. This process is much slower and more complicated than the evaporation of a volatile solvent. A surface may become touch-dry while deeper material remains comparatively mobile.
The familiar fat-over-lean rule attempts to manage this changing mechanical relationship. Relatively lean lower layers and progressively compatible upper layers reduce the likelihood that a hard surface will be forced to accommodate movement beneath it.
Two potentially damaging situations deserve distinction. A lean, fast-hardening upper layer placed over an oil-rich, slowly hardening underlayer may become rigid before its foundation stabilizes. Conversely, substantial upper paint applied over inadequately dried underpainting may harden at the surface while movement and continued drying below cause wrinkling or cracking.
The Canadian Conservation Institute guidelines on caring for paintings describe drying cracks, including alligatoring, associated with an upper film hardening while its underlayer remains soft and malleable. The institute also distinguishes some stable drying cracks from deterioration that remains active.
« The top layer dries and hardens while the underlayer remains soft and malleable. Movement in the underlayer causes the hardened top layer to crack and retract. »
Early warning signs include surface wrinkling, unusually persistent softness beneath a dried skin, localized cracking and visible lifting at layer boundaries. None independently proves a particular layering mistake.
Thickness and environment further complicate outcomes. A thin passage on a stable support may behave differently from a thick passage on flexible canvas, even when both use similar paint mixtures. Fluctuating relative humidity can add stresses through movement of the support and ground.
The practical conclusion is that cracking risk must be assessed through film behavior rather than an assumed five-year deadline. Controlling that behavior begins with understanding what each paint layer actually contains.
How Do You Ensure Each Paint Layer Has More Oil Than the One Below It?
To maintain a controlled fat-over-lean progression, document the original paint, added medium, application thickness and drying condition at every session. Compare successive layers rather than relying on a fixed number of oil drops. Increasing medium additions may support the intended progression, but it cannot establish exact total oil content or guarantee structural compatibility.
The starting composition matters because tube paints contain different proportions of pigment and binding oil. Pigment absorption properties, manufacturing methods and the choice of drying oil influence the mixture before any additional medium enters the palette.
The Williamsburg oil-content measurements published by Golden Artist Colors illustrate these differences and explain why binder content must be considered alongside film thickness and drying speed. The measurements apply to a specific product range, not every brand.
A useful record identifies the paint brand and color, medium type, approximate addition, treatment of the underlying surface and observed drying condition. This provides a reproducible account of decisions, although it does not yield an exact laboratory measurement of the finished film.
The following decision grid illustrates how to respond to common layering conditions. These are practical risk-management judgments, not experimentally validated universal formulas.
| Observed condition | Recommended approach | Principal limitation |
|---|---|---|
| Thin, adequately dried lower layer | Apply a compatible upper paint mixture without excessive medium. | Check the original paint’s binder and drying characteristics. |
| Soft, oil-rich underpainting | Delay the next layer and reassess readiness. | Extra oil above does not correct an unstable foundation. |
| Very absorbent, underbound-looking passage | Investigate whether excessive solvent or an unsuitable ground caused binder deficiency. | Additional oil cannot reliably repair severely underbound paint. |
| Firm surface with localized sinking-in | Consider restrained oiling-out only if the film is otherwise sound. | A residual oil-rich coating can create an undesirable weak interface. |
| Increasingly thick upper passages | Control thickness and allow sufficient drying between applications. | Greater oil content does not neutralize the risks of thick paint. |
Extremely lean underpainting requires special care. Excessive solvent can leave paint insufficiently bound, while acrylic grounds are separate polymer systems whose compatibility depends on proper preparation and suitable products. Neither should be treated simply as a paint layer containing zero oil.
Five checks before applying the next oil paint layer
- Record the current session number and painting area; produce a dated layer entry.
- Identify every paint and medium used; produce a materials list with approximate additions.
- Compare the planned mixture with the underlying one; record potential oil-content, thickness and drying-speed conflicts.
- Inspect the lower film for tackiness, softness, wrinkles and poor adhesion; record a proceed-or-wait decision.
- Document the completed application and any unusual behavior; produce a reference for the following session.
Once the materials are documented, the next decision is how rapidly they should harden. Alkyd and traditional drying-oil mediums make this a particularly important choice.
Alkyd vs Linseed Oil: Which Medium Lets You Layer Faster Without Cracking Risk?
Alkyd mediums generally allow faster surface drying than adding ordinary linseed oil, making them useful for painters working across closely spaced sessions. Linseed oil usually extends working time and changes paint handling more gradually. Neither medium eliminates cracking risk: the safe choice depends on the underlying film, application thickness, formulation and timing of subsequent layers.
Linseed oil is a traditional drying binder whose oxidizing film develops over an extended period. Its performance is influenced by oil processing, pigment chemistry, film thickness and surrounding conditions. Adding too much oil can increase yellowing, wrinkling or other defects rather than improving longevity.
Alkyd mediums incorporate modified resin systems designed to alter handling and drying behavior. They can accelerate the formation of a workable paint surface, but a shorter interval before touch-drying should not be confused with full through-film curing.
According to Gamblin‘s technical specifications for fluid oil-painting mediums, its Galkyd medium has a reported drying time of approximately 24 hours, compared with 36 hours for Galkyd Lite. These are manufacturer-reported, product-specific times rather than general recoating guarantees.
| Criterion | Alkyd medium | Linseed oil |
|---|---|---|
| Surface drying | Often accelerated, depending on formulation | Generally prolonged when additional oil is incorporated |
| Working characteristics | Varies by resin product and concentration | Typically increases flow and working time |
| Thin glazing | Suitable products can enable faster glazing sessions | Suitable for traditional thin glazing with controlled medium additions |
| Layering risk | Rapid hardening above soft paint may create incompatibility | Excessive oil or thick applications may remain soft for extended periods |
| Best planning approach | Maintain a consistent, manufacturer-compatible system | Allow longer intervals where needed and control film thickness |
Mixing both systems is not automatically unsafe. The more important question is whether a rapidly hardening alkyd-rich upper layer is being placed above relatively soft, linseed-rich paint. Such a sequence deserves particular caution. A properly dried, compatible foundation presents a different situation from a wet or tacky one.
For a project developed over a few days, a coordinated fast-drying system can be practical. For a painting developed over several weeks, traditional oil mixtures may provide sufficient flexibility in scheduling. In both cases, actual readiness is more important than the calendar.
The most problematic sequence is not necessarily the slowest one, but the one that traps persistent movement beneath a film already becoming rigid. That mismatch explains why lean-over-fat failures can extend beyond visible surface cracking.
The Lean-Over-Fat Disaster: What Happens When Top Layers Crack and Detach From Flexible Underpainting
Lean-over-fat layering can produce cracking, lifting or separation when a comparatively rigid upper layer rests on a softer, oil-rich foundation. Continued movement below stresses the interface, potentially weakening adhesion over time. However, the appearance of cracks alone cannot definitively identify lean-over-fat as their cause; support movement, impact and material defects may produce overlapping symptoms.
Imagine a hypothetical painting with a substantial, slow-drying lower passage covered by a thin, fast-hardening upper mixture. The exposed film may appear dry while the underlying material continues to oxidize and change mechanically. Stress can concentrate at boundaries where the layers respond differently.
Fine surface fissures may develop first. Where adhesion is weak, the paint can also begin lifting or separating into flakes. The resulting deterioration is more serious than an isolated, stable drying crack because detachment threatens actual loss of painted material.
The location of the damage offers diagnostic clues. Cracking concentrated above thick or unusually soft passages may suggest a layering problem. Cracks extending across the entire painting, following canvas deformation or accompanied by ground separation, may instead reflect broader structural stresses.
Assessment should consider the thickness and apparent rigidity of each accessible layer, the presence of active flaking, the condition of the support and the painting’s environmental history. Photographs taken under consistent raking light can help document whether damage is progressing.
For an existing painting, active lifting or flaking warrants assessment by a qualified paintings conservator. Professional treatment may involve stabilizing vulnerable paint, examining adhesion and considering localized consolidation. Such interventions require material-specific judgment and should not be improvised with painting mediums or household adhesives.
A stable crack may need monitoring rather than immediate intervention. Conversely, an extensively defective and actively separating structure may be impractical to repair reliably. For an unfinished personal work, restarting on a sound foundation can sometimes be more reasonable than burying unstable passages under additional paint.
The simplest preventive measure remains a checkpoint before each new application: compare the intended layer with the actual condition of the paint beneath it, not merely the remembered recipe.
Where no structural defect is visible, prevention depends heavily on timing. A well-designed mixture can still fail when the next layer is applied before its foundation is ready.
The Drying Window: How Long to Wait So New Layers Bond Without Disturbing Old Ones
The correct drying window is determined by the condition of the paint film rather than a universal number of days. The lower layer must be stable enough to resist disturbance during application, while the new paint must adhere to a compatible surface. Tackiness, softness, thickness, pigment composition and medium choice all influence that decision.
Oil paint develops through multiple stages. It may lose surface tack, become resistant to gentle handling and continue curing internally long afterward. Because oxidation and mechanical development are ongoing, a touch-dry film should not be assumed fully cured.
Inspection is most useful when several observations agree: the surface no longer feels tacky, no paint transfers during an appropriately cautious test, gentle contact does not produce indentation, and the surface shows no wrinkling or movement.
Avoid pressing directly on a valuable or fragile passage. Even light contact can mark incompletely dried paint. Where practical, use a small test panel prepared with the same materials and thickness rather than risking the original painting.
Two separate questions should guide the painter. First, will the new brushwork disturb, dissolve into or physically disrupt the existing passage? Second, will the resulting combination of layers remain mechanically compatible as both continue aging?
The first question concerns immediate handling. The second concerns longer-term performance. Passing an initial touch test cannot establish the answer to both.
Oiling-out is sometimes used when a sound, dried passage has become visibly sunken or unevenly absorbent. A very small quantity of compatible oil or medium can be distributed across the affected area, with excess removed so that no substantial free-oil film remains.
This treatment primarily addresses surface appearance and handling. It is not a universal adhesion primer, does not reverse the curing of old paint and cannot compensate for inadequate drying or an unstable layer. Excess oil left on the surface introduces its own risks.
When a fast session is necessary, reducing application thickness and choosing a compatible drying system are more defensible adjustments than simply applying another layer to tacky paint. If the underpainting moves or transfers, postpone the work.
Long-term painting survival also depends on factors beyond drying speed. Historical works illustrate why support, materials, environment and conservation history must all enter a durability assessment.
Why Do Paintings From 1950 Show More Colour Loss Than Works From 1550?
There is no established general rule that paintings created in 1950 show more colour loss than paintings made in 1550. Individual works age differently according to pigments, binding media, grounds, preparation, exposure and conservation history. Some older paintings remain visually impressive, but their survival does not demonstrate that historical methods were universally more durable.
Traditional European oil painting includes many examples of carefully controlled multilayer construction. Artists developed underpaintings, opaque modeling and transparent passages using materials and procedures that varied substantially across workshops and historical periods.
Surviving works can demonstrate the longevity achievable with particular combinations of materials and craftsmanship. However, the paintings visible in collections today are a selected population. Many have undergone cleaning, structural treatment, retouching, lining or other conservation interventions.
Survivorship bias is therefore unavoidable: damaged or lost works cannot be assessed in the same way as paintings preserved by major institutions.
Twentieth-century artists also employed an expanded range of commercially prepared paints, synthetic materials, modern grounds and experimental working methods. These changes widened artistic possibilities but introduced different material combinations whose aging behavior varies.
It would be inaccurate to attribute earlier deterioration across an entire period to faster working methods or industrial paints alone. Historical and modern paintings both include sound and unsuccessful material choices.
The comparison becomes useful when translated into concrete conservation questions. Was the support properly prepared? Were the paint layers sufficiently bound? Did successive applications have compatible mechanical properties? Were vulnerable colors protected from inappropriate environmental exposure?
Colour loss also needs to be separated from cracking. Pigment fading, discoloration of binding media, surface dirt, varnish changes and paint detachment are different phenomena requiring different explanations. A structurally intact painting can change colour, while a cracked painting may retain much of its original chromatic intensity.
The most useful historical lesson is not to imitate every old formula, but to build a stable foundation for the visual effects that multilayer painting makes possible. Transparent glazing is one of the clearest examples.
Why Do Glazed Paintings Glow From Within While Opaque Paintings Look Flat?
Transparent glazes can create an impression of internal luminosity because light interacts with both the colored upper film and the paint beneath it. A lighter underlying passage can contribute reflected light that passes back through the glaze. Opaque paint more strongly obscures the lower layer, but opacity alone does not make a painting visually flat.
A glaze is a transparent or translucent colored paint layer that modifies an underlying passage without completely concealing it. The resulting appearance depends on pigment transparency, film thickness, surface characteristics and the color beneath.
The National Gallery definition of a painting glaze identifies these thin films as a means of changing underlying color and obtaining tonal variation through differences in glaze thickness.
Consider a hypothetical pale yellow underpainting covered with a thin transparent reddish glaze. The resulting appearance can differ from a single opaque mixture of superficially similar hue because the light has interacted with multiple distinct paint films.
This does not mean that every glaze behaves like a perfectly transparent colored window. Pigment particles can absorb and scatter light, and the apparent depth depends on the materials and viewing conditions. Likewise, opaque painting can produce remarkable luminosity through value structure, color relationships and surface handling.
The underpainting is fundamental to the result. An unsuitable or poorly prepared foundation may lack the desired optical clarity, while a structurally defective layer can eventually compromise the appearance of the glaze above it.
Glazing therefore requires both optical and mechanical planning. The painter must decide which areas should remain light, where transparent color should accumulate and whether the existing layer is sufficiently stable to receive another film.
Glazes are not necessarily the fattiest or slowest-drying layers in every painting. Their composition varies according to pigment, binder and medium. Excessive medium can be especially problematic when it produces a thick, weak or slowly hardening film.
Once the optical purpose is clear, glazing becomes a sequence of deliberate material decisions rather than an attempt to obtain richness by repeatedly adding transparent paint.
Key takeaways before glazing
- Choose the underlying value and color deliberately: a glaze modifies what is already present rather than replacing it.
- Use transparent pigments and restrained medium additions, with each layer thin enough to avoid unnecessary buildup.
- Treat each glaze as another structural layer requiring a compatible foundation and a fresh drying-readiness assessment.
How Do Transparent Glazes Create Glowing Complexity Impossible With Single Paint Coats?
Successive transparent glazes create complex color effects by modifying the light reflected and scattered from underlying paint layers. Each film adds a new optical interaction, allowing subtle changes in hue, depth and tonal relationships. These effects can be difficult to reproduce with a single opaque mixture, although multiple glazes are not inherently more durable or artistically superior.
The process begins with a sound, sufficiently dried underpainting. Areas intended to appear luminous generally benefit from an underlying value structure capable of reflecting light through the transparent passages.
Choose a pigment known to behave transparently in the intended formulation. Add only the quantity of compatible painting medium needed for the desired handling and translucency. The appropriate proportion depends on the paint and medium; no universal oil-to-pigment ratio is established by the supplied technical sources.
Work the mixture into a thin, controlled film using a suitable soft brush. Avoid leaving puddles of medium or thick accumulations around edges and textured passages. Greater transparency should not be pursued by indefinitely increasing the oil fraction.
Plan the intended color sequence before starting. For example, a hypothetical landscape painter might establish pale atmospheric values, introduce a transparent warm color and later adjust selected shadows with another transparent passage. Each stage should serve a specific optical purpose.
After applying the first glaze, allow it to develop sufficient stability before considering another. Reassess surface condition, compatibility and thickness. More glazes do not automatically produce more visual depth; additional films can darken the result, obscure detail and compound structural risks.
No evidence in the supplied sources establishes a universally safe number of glaze layers. The appropriate stopping point is determined by the visual objective and the behavior of the actual materials.
The final glaze should also be distinguished from a finishing varnish. A painting medium is not automatically suitable as a varnish, and the decision to varnish requires separate consideration of material compatibility and adequate curing.
For archival ambitions, record the completed glaze sequence with the paint and medium names, approximate mixture proportions, dates and observations. These notes can assist future material decisions and provide useful context if a conservator eventually examines the painting.
For the next painting session, begin with a small test panel using the intended ground, paints and mediums. Establish a thin underpainting, document each successive application and proceed only when its condition supports the next step. This disciplined approach develops both the luminous possibilities of glazing and a more defensible strategy for long-term paint-film stability.
Can a painting crack even when every layer follows fat-over-lean?
Yes. Fat-over-lean addresses only part of the risk. Excessive paint thickness, poor adhesion, unsuitable grounds, support movement, environmental fluctuations and inadequate drying can all contribute to cracking. A compatible overall structure matters more than oil content alone.
Does touch-dry oil paint mean the next layer is safe to apply?
No. Touch-drying indicates a change at the surface, not complete curing throughout the film. A painter should also consider underlying softness, thickness, materials and whether subsequent brushwork could disturb the passage. Product-specific drying guidance can inform the decision but cannot replace assessment of the actual painting.
Can adding extra linseed oil repair an underbound paint layer?
Not reliably. An underbound film may have insufficient binder to hold its pigment properly. Applying more oil above it does not necessarily restore its internal cohesion and may introduce an oil-rich interface. Suspected underbinding should be assessed before additional paint is applied.
Is it better to use the same painting medium throughout a multilayer work?
A consistent, compatible medium system can simplify planning and reduce uncertainty, particularly for beginners. Nevertheless, using one medium throughout does not guarantee success because original paint formulations, pigment drying behavior, application thickness and waiting intervals still vary.
Should a painting with small cracks always be restored?
No. Some drying cracks are stable and remain firmly attached to the underlying paint. Active flaking, lifting, new paint loss or progressive deformation are more concerning. The appropriate response depends on the cause and condition of the work, ideally assessed by a qualified paintings conservator when significant deterioration is suspected.