
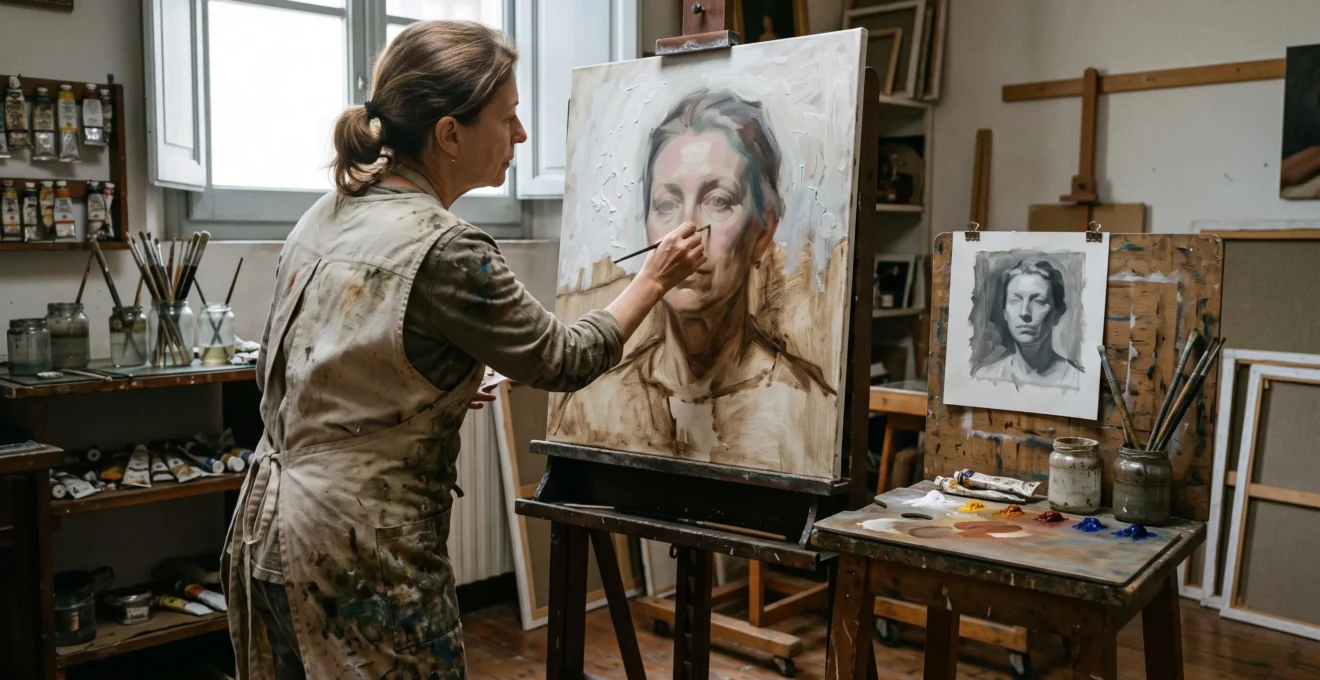
A painting can contain beautiful colours, expensive pigments and carefully rendered details yet still fail to communicate convincing form. Another painting, executed with a handful of colours and economical brushstrokes, can feel remarkably complete. The difference often lies in technical decisions made before the final surface becomes visible.
Professional-quality painting begins with control of drawing, tonal values, light, colour relationships and paint application. These foundations allow an artist to predict results, identify mistakes and choose techniques deliberately instead of relying on repeated corrections.
Traditional studio training develops these abilities through observation, monochrome studies, controlled colour mixing and progressively more demanding paintings. Oil painters must also understand how their materials behave as successive layers dry.
For beginning and intermediate painters, the most productive goal is not to imitate a particular finished style. It is to develop a reliable working process in which every major decision supports the next. Once that process becomes dependable, expressive freedom becomes considerably more useful.
Essential principles for stronger paintings
- Establish values before refining colour. Convincing light, volume and visual hierarchy depend on coherent tonal relationships.
- Control application and drying. Appropriate layering, deliberate brushwork and careful medium use improve both appearance and durability.
- Practise fundamentals systematically. Drawing, light, colour and material knowledge provide the foundation for advanced techniques and personal expression.
- Why Do Paintings With Perfect Colour but Wrong Values Look Flat and Unconvincing?
- How Do You Apply Oil Paint in the Correct Sequence to Avoid Structural Failure?
- Alla Prima vs Glazing: Which Technique Achieves Luminous Depth Versus Fresh Immediacy?
- The Brushwork Mistake That Turns Vibrant Colours Into Grey Mud
- The Skill Milestone: When You Have Enough Technical Control to Develop Original Expression
- Why Do Self-Taught Artists Who Skip Fundamentals Hit Insurmountable Skill Ceilings?
- Why Do Paintings That Violate Fat-Over-Lean Crack Within 5 Years?
- Which Core Artistic Abilities Must Be Solid Before Learning Complex Techniques?
Why Do Paintings With Perfect Colour but Wrong Values Look Flat and Unconvincing?
Accurate colour cannot fully compensate for incorrect tonal values because values establish the separation between light and shadow, describe three-dimensional form and organise visual attention. When those relationships are weak, objects lose volume and the lighting becomes ambiguous. A painting may therefore contain believable hues while its subjects appear flat or disconnected.
Value means the relative lightness or darkness of a colour. Two colours can have very different hues yet similar values, making their boundaries less distinct than expected. Conversely, a limited palette can describe convincing form through carefully organised light and dark relationships.
The National Gallery of Art‘s Monet’s Waterscapes educational resource defines value in terms of lightness and darkness and explores how colour relationships influence visual perception. It provides a useful framework for distinguishing tonal structure from colour effects.
Values perform three separate jobs within a representational painting:
- Form modelling: Gradations and boundaries between light and shadow describe the volume and orientation of surfaces.
- Visual hierarchy: Strong contrasts can draw attention towards a focal point, while quieter value relationships support surrounding areas.
- Lighting coherence: Consistent relationships between illuminated planes, halftones and shadows help establish a believable light source.
A weakness in any one of these functions can reduce the image’s clarity. A portrait might have well-modelled cheeks but an excessively bright background that competes with the face. A still life might contain strong contrast yet assign inconsistent values to objects illuminated by the same window.
To diagnose a value problem, photograph the painting under even lighting and convert the image to greyscale. Compare the resulting pattern of light and dark with the subject. Squinting at both can also suppress distracting detail and simplify broad tonal masses. A darkened viewing mirror provides another traditional comparison, although it does not eliminate colour information as reliably as a greyscale conversion.
For a practical exercise, paint a white ceramic jug against a mid-tone cloth using only three to five predetermined values. Establish the largest light and shadow shapes before modelling smaller transitions. The exercise reveals whether the image remains intelligible without hue.
Grisaille and monochromatic underpainting are valuable because they let painters solve major tonal problems before committing to complex colour layers. These are established traditional options, not compulsory stages in every painting method.
Once the underlying value structure works, colour can develop the painting without carrying the entire burden of describing volume. The next challenge is applying that colour through a physically sound painting process.
How Do You Apply Oil Paint in the Correct Sequence to Avoid Structural Failure?
For a traditional multilayer oil painting, begin with a suitably prepared support, establish the drawing and lean initial passages, develop forms through controlled intermediate layers, and reserve richer or thicker applications for appropriate later stages. Allow underlying layers to dry adequately before overpainting. The objective is to maintain compatible flexibility, thickness and drying behaviour throughout the paint film.
Oil paint hardens primarily through oxidative reactions rather than simply losing a liquid component through evaporation. A surface may feel dry while material beneath remains comparatively soft. When a rapidly hardening upper layer sits over a slower-changing, less stable lower layer, internal movement can create damaging stresses.
Fat over lean is therefore one part of a broader construction method. Winsor & Newton‘s three oil painting rules identifies three complementary principles: fat over lean, thick over thin, and slow-drying over fast-drying.
A practical traditional workflow can follow this sequence:
- Prepare the support and drawing. Use a support appropriately sized and primed for oil painting. Establish placement, proportions and major contours with a restrained initial application.
- Develop a lean underpainting. Organise the principal shadow masses and light relationships using relatively thin paint, with medium use appropriate to the chosen system.
- Block in the larger colour and form relationships. Introduce opaque passages, maintain the established values and avoid unnecessary thickness.
- Refine intermediate layers. After suitable drying, strengthen modelling, adjust edges and develop colour without creating incompatible layer relationships.
- Apply finishing passages. Add selected glazes, accents or thicker highlights where they serve the painting and remain compatible with the layers beneath.
Three variables deserve separate attention: medium composition, paint thickness and drying time. Adding more oil is not automatically beneficial, and excessive dilution can produce a weak paint film. Different pigments and formulated mediums can also alter handling and drying behaviour.
Five checks for a controlled oil-painting session
- Inspect the support: confirm that its preparation is suitable for oil paint; record the support and ground used.
- Write a layer plan: identify the intended drawing, underpainting, modelling and finishing stages on a one-page worksheet.
- Record medium use: note the paint colours, medium type and relevant mixture proportions for each session.
- Assess the previous layer: document whether it is adequately dry for the intended overpainting, following the chosen materials’ guidance.
- Inspect the finished session: use raking light to identify unexpectedly thick ridges or surface changes; add observations to the painting log.
Impasto and oil-rich passages are compatible with durable work when properly managed. They should not, however, be applied indiscriminately beneath thin layers that are expected to harden sooner. Alkyd mediums may call for different handling from traditional oil-and-solvent mixtures, making product-specific instructions and preliminary studies important.
With a stable construction plan established, the painter can choose between direct execution and the more gradual development of optical effects through successive layers.
Alla Prima vs Glazing: Which Technique Achieves Luminous Depth Versus Fresh Immediacy?
Alla prima is generally the better choice for fresh, immediate brushwork because colours are placed and adjusted directly while the paint remains workable. Glazing is suited to gradual colour refinement and transparent optical effects over established layers. Neither method guarantees superior luminosity; the best choice depends on the subject, desired surface, working time and degree of control.
In alla prima, commonly called wet-on-wet painting, successive strokes interact with still-wet paint. This permits responsive edge work, direct colour adjustments and visible brush marks. It also demands discipline because repeated intervention can disturb previously established colour relationships.
Glazing takes a different approach. A transparent or sufficiently translucent coloured layer is applied over an adequately dried passage. Light interacts with the upper layer and underlying paint, changing the perceived colour and depth of the surface. Pigment transparency, layer thickness and the reflectance of the underlying passage all influence the effect.
A transparent glaze is not interchangeable with scumbling. A glaze allows the underlying passage to remain visible through the applied colour. Scumbling uses a comparatively opaque or semi-opaque application that partially obscures the lower layer, often creating a softened, broken or atmospheric surface.
The distinction becomes clearer when both methods are evaluated against practical painting decisions.
| Decision factor | Alla prima | Glazing |
|---|---|---|
| Working schedule | Often completed in one session or a continuous wet working period | Usually requires separate applications and adequate drying intervals |
| Value development | Established through direct placement and adjustment | Can begin with an underpainting and be modified through later transparent layers |
| Colour effects | Direct pigment mixtures, adjacency and wet-paint interaction | Transparent colour modifying underlying passages |
| Corrections | Immediate changes are possible but risk disturbing wet passages | Later adjustments are possible, provided the underlying structure and layer compatibility are respected |
| Typical learning challenge | Decisive brush placement and wet-paint control | Transparency, drying intervals and controlled layering |
Gamblin‘s explanation of indirect painting describes a traditional process in which an initial transparent underpainting can be followed by opaque modelling and final transparent glazes. It also recognises alternative indirect methods, including glazing over a monochromatic foundation.
For a rapid portrait study, direct painting may preserve the spontaneity of observed colour and expressive edges. For an atmospheric passage requiring subtle colour modification, glazing may offer a more controllable approach. These are practical choices rather than rigid rules assigned to particular subjects.
Both methods can exist within the same painting. An artist might establish broad forms directly, allow selected areas to dry and later glaze passages that require greater chromatic refinement.
The common requirement is control of paint interaction. Whether working directly or in stages, poor brush management can quickly undermine carefully selected colours.
The Brushwork Mistake That Turns Vibrant Colours Into Grey Mud
The most common brushwork error behind muddy colour is repeatedly working adjacent wet passages without controlling what accumulates on the brush. Each new stroke collects traces of earlier mixtures, gradually blending pigments that were intended to remain distinct. The resulting loss of chromatic clarity is often a handling problem rather than evidence that the original palette was incorrectly chosen.
Consider a hypothetical still-life exercise featuring an orange object against a blue-grey cloth. The painter places a warm orange light, adjusts its edge with a cool background stroke, then repeatedly brushes across the boundary. Pigments from both areas accumulate and spread. Instead of a controlled transition, the boundary becomes a dull, uniform mixture.
This process differs from intentionally neutralising a colour on the palette. A deliberate mixture has a chosen purpose; accidental mixing on the canvas does not.
Traditional limited palettes help painters become familiar with pigment behaviour, but their success still depends on brush cleanliness and restraint. A few well-chosen pigments can produce a wide range of relationships, while careless handling of those same pigments can reduce their distinctiveness.
Physical mixing is also different from placing colours beside each other. Complementary colours may intensify one another through simultaneous contrast when viewed in adjacency, yet mixing particular complementary pigments often reduces chroma through subtractive interaction. The exact result depends on the pigments’ spectral properties and proportions, not simply their colour-wheel labels.
To maintain clarity, establish each mixture before placing it, wipe or clean the brush when moving between substantially different colours, and minimise unnecessary passes through wet transitions. Use larger strokes to organise the main masses before introducing smaller accents.
A helpful drill is to paint a simple object using a restricted palette and permit no more than two deliberate strokes for each small passage before reassessing. The two-stroke limit is a teaching constraint, not a universal painting rule. Its purpose is to expose the habit of correcting every stroke immediately.
Leave successful passages alone. When an area becomes overworked, removing unsuitable wet paint or allowing the passage to dry before repainting may be more effective than continuing to blend.
Economical brushwork develops through observation and repetition. The larger achievement is learning to recognise a successful mark and knowing when further intervention would make it worse.
The Skill Milestone: When You Have Enough Technical Control to Develop Original Expression
A painter has reached a useful threshold for developing a more deliberate personal expression when technical decisions become sufficiently predictable to support intentional choices. This does not require flawless execution. It means the artist can establish convincing values, anticipate basic colour and brushwork effects, recognise structural mistakes and reproduce useful results without depending entirely on accidents.
Technical maturity is better evaluated through repeatable actions than through a feeling of artistic readiness. A painter who can complete one convincing portrait but cannot explain or reproduce its main effects has demonstrated a result, not necessarily reliable control.
Three observable abilities provide a more useful test:
- Prediction: The painter can describe the expected value, edge or colour effect before placing a mark and can usually produce something close to that intention.
- Diagnosis: When a passage fails, the painter can distinguish a drawing problem from a value, colour or handling problem.
- Repetition: A useful effect achieved in one study can be deliberately attempted in another, with the painter understanding which variables matter.
Master copies have a legitimate role in developing these abilities. The Metropolitan Museum of Art documents the importance of copying, perspective, anatomy and life drawing within the historical education offered by the French Academy in Rome. Such practices demonstrate the longstanding role of disciplined observation, although they do not establish a universal route to artistic originality.
For contemporary students, a productive progression is copy, interpret, then invent. First, analyse a selected painting and reproduce its major structural relationships. Next, reinterpret the subject under altered lighting or with a different palette. Finally, develop an original composition using the same underlying principles.
The danger of pursuing a personal style without understanding the underlying craft is not unconventional appearance itself. It is the inability to distinguish deliberate distortion from a recurring technical mistake.
An artist may choose flattened space, exaggerated colour or broken drawing for expressive reasons. Those choices become more meaningful when the artist understands the conventional alternatives and can use them when appropriate.
Original expression need not wait until every technical weakness disappears. Experimentation can accompany foundational training. The milestone is reached when the painter gains increasing control over the relationship between intention and result.
That independence grows more slowly when essential gaps remain hidden. Identifying those gaps is particularly important for artists building their education outside a structured studio programme.
Why Do Self-Taught Artists Who Skip Fundamentals Hit Insurmountable Skill Ceilings?
Self-taught painters can encounter persistent skill plateaus when they practise advanced effects without establishing the underlying abilities those effects require. Weak drawing, inconsistent values or uncontrolled layering may remain manageable in simple exercises but become increasingly disruptive in complex compositions. These limitations are not necessarily insurmountable; targeted foundational practice can address them at any stage.
The difficulty is cumulative. A painter struggling with proportion may compensate by repeatedly adjusting contours. If tonal relationships are also unstable, colour decisions become attempts to disguise the original drawing problem. Adding glazing or complex brushwork introduces further variables without solving the underlying weakness.
Visible mistakes are often easier to correct than habitual procedural errors. An obviously misplaced eye can be measured and redrawn. A persistent habit of painting details before establishing broad shapes may remain unnoticed because every individual adjustment appears reasonable.
The most useful self-diagnostic question is not simply what looks wrong, but which earlier decision allowed the problem to develop.
Examine several unfinished or disappointing paintings and identify recurring patterns:
- Forms consistently lose volume: investigate value grouping, light logic and underlying drawing.
- Compositions require repeated resizing: investigate initial measurements, proportions and placement.
- Colours become dull during execution: investigate brush contamination, mixture planning and wet-paint handling.
- Layered works remain difficult to control: investigate application thickness, medium use and drying intervals.
- Paintings stall after the initial sketch: investigate the transition from broad masses to intermediate modelling.
These relationships are diagnostic starting points, not definitive proof of a particular cause. A single symptom can have several explanations.
Historical academic teaching frequently placed substantial emphasis on observational study, drawing and copying established works. The Metropolitan Museum of Art’s account of the French Academy in Rome provides an institutional example. That history does not prove that contemporary self-directed education is inferior, but it illustrates how sustained, related exercises can form a coherent training process.
A self-taught painter can reproduce that coherence without enrolling in an academy. Select one recurring weakness, design a small study that isolates it, document the outcome and repeat the exercise under slightly different conditions.
For example, if complex interiors repeatedly lose depth, practise simplified perspective drawings and monochrome room studies before attempting another detailed interior painting. The aim is to separate the fundamental problem from competing demands.
A plateau is often an indication that training should become more focused, not that artistic potential has been exhausted. Technical improvement also requires attention to failures that may develop only after a painting appears finished.
Why Do Paintings That Violate Fat-Over-Lean Crack Within 5 Years?
Violating fat-over-lean principles can increase cracking risks because incompatible layers may harden, contract or respond to movement differently. However, there is no established rule that such paintings crack within five years. Damage may appear sooner, much later or not become visibly apparent during the period observed, depending on materials, application, support and environmental conditions.
Fat over lean is primarily concerned with constructing successive oil-paint layers that remain mechanically compatible as they age. In a conventional layered method, lower applications should generally form a suitable foundation for subsequent paint rather than remain comparatively soft and mobile beneath a more rigid film.
Two distinct classes of problems deserve attention.
Drying-related paint-film failures can result from incompatible drying behaviour, excessive thickness or unsuitable layering. When an upper film changes differently from the material beneath it, stresses may contribute to cracking, wrinkling or adhesion problems.
Support-related deformation involves movement or instability in the surface carrying the paint. Flexible fabric, unsuitable preparation, changing environmental conditions and mechanical tension can affect the painting independently of the fat-over-lean relationship.
These causes can interact, but they are not interchangeable. Adding more oil to upper layers does not correct an unstable support, and improving the support does not eliminate every risk associated with incompatible paint applications.
The technical recommendations published by Winsor & Newton address flexibility, relative thickness and drying order as related preventive considerations. They offer practical risk-reduction guidance, not a guarantee of permanent stability or a fixed timetable for failure.
Prevention is most useful at three stages:
- Before painting: select an appropriately prepared support and review the intended paint and medium system.
- During painting: maintain a session record identifying materials, layer thickness and drying intervals. Follow the manufacturer’s instructions for the specific products used.
- After painting: periodically examine the surface under gentle, oblique lighting for unexpected texture changes, lifting or cracks, without applying pressure or attempting improvised repairs.
Thin applications with significant solvent content require caution because too much solvent can compromise paint-film integrity. Alkyd-based mediums may alter drying behaviour and should not automatically be treated as equivalent to added traditional oil.
Thick impasto can also require extended internal drying despite a seemingly firm surface. For that reason, a small materials study is valuable before employing an unfamiliar combination in a painting intended for long-term preservation.
Visible cracking does not by itself establish its cause. Where damage has already appeared on a valued artwork, a qualified paintings conservator is better placed to assess the materials and recommend an appropriate response.
Durability is a technical responsibility rather than a cosmetic finishing detail. Understanding the materials is part of the same foundational competence that supports drawing, colour and expressive control.
Key takeaways before advancing
- Judge readiness through repeatable studies that demonstrate drawing, value and colour control rather than through the complexity of a finished painting.
- Identify whether each recurring weakness is perceptual, procedural or material before selecting the next exercise.
- Advance to elaborate methods when simpler decisions are sufficiently dependable to support them, while continuing to experiment and refine earlier skills.
Which Core Artistic Abilities Must Be Solid Before Learning Complex Techniques?
The most useful foundation for complex painting techniques combines accurate observation and drawing, controlled values, an understanding of light, practical colour mixing and deliberate paint application. Material knowledge is an additional essential competence, particularly for oil painters. These abilities develop together, but learning becomes more manageable when each is tested through an observable exercise before additional complexity is introduced.
Traditional foundational training can be organised as a progression rather than an isolated collection of techniques.
| Competency | Essential ability | Observable assessment |
|---|---|---|
| Observation and drawing | Identify proportion, alignment, perspective and major shapes | Complete a measured drawing of a draped cloth or simple still life and compare its principal proportions with the subject |
| Tonal values | Separate light, halftone and shadow into coherent relationships | Paint a monochrome still life with a deliberately limited value scale |
| Light and form | Interpret how plane direction and illumination affect visible form | Study one object under a stable directional light without changing the lighting during the exercise |
| Colour relationships | Control hue, value, chroma and mixtures with a limited palette | Produce a colour study that preserves the values of an earlier monochrome version |
| Paint application | Control stroke placement, edges, thickness and appropriate layering | Repeat a small passage using a planned sequence and record the resulting surface |
| Material knowledge | Recognise differences in opacity, transparency, drying and medium behaviour | Create labelled pigment and medium swatches on a suitably prepared test support |
This progression begins with observation because an artist must first recognise the relationships being represented. Drawing provides a framework for placement and proportion. Value organisation then establishes the apparent form and lighting within that framework.
Colour becomes easier to manage once the painter can distinguish a hue problem from a tonal error. A limited palette is particularly useful during training because it reduces the number of interacting variables while encouraging deliberate mixtures.
Application skills connect those visual decisions to physical paint handling. Knowing what colour belongs on a surface is different from being able to place it cleanly, control its edge or preserve the underlying passage.
Material knowledge deserves its own assessment. Two pigments of similar appearance may differ in opacity, tinting strength or drying behaviour. An artist who understands these differences can select materials more deliberately and avoid unnecessary complications in multilayer work.
None of these exercises needs to produce a gallery-ready result. Each should answer a specific question: Can the painter maintain proportions? Can a subject be modelled without colour? Can the same lighting structure survive a change of palette? Can the intended surface be produced with a repeatable sequence?
The next stage is to combine the competencies gradually. A monochrome still life can become a restricted-palette colour study, then a carefully constructed multilayer painting. Each version introduces a manageable new challenge while retaining previously tested foundations.
Technical readiness is also context-dependent. A painter may be well prepared for direct landscape studies while still needing specialised practice before attempting complex indirect portraiture. There is no single certificate of mastery that applies to every subject and technique.
Choose one subject, produce a drawing, a monochrome study and a restricted-palette painting, then compare the three outcomes. Record the decisions that became more reliable and the problems that remain. That documented progression provides a practical foundation for the next technical challenge and, ultimately, more deliberate artistic expression.
Can beginners learn oil painting without first mastering drawing?
Yes. Drawing and painting can be studied together. However, regular observational drawing helps painters recognise proportions, boundaries and spatial relationships before colour and paint handling introduce additional demands. Short drawing exercises alongside painting sessions can build these abilities without requiring complete drawing mastery in advance.
Is monochrome underpainting necessary for every oil painting?
No. Grisaille and related underpainting methods help organise values before colour, making them useful for traditional indirect painting and technical training. Direct alla prima painting can establish drawing, values and colour within the same working process. The appropriate method depends on the intended result and the painter’s control.
Should transparent glazes always be applied over white paint?
No. Transparent glazes can modify a variety of adequately dried underlying colours and values. A light-coloured foundation may contribute to luminous effects, but darker or coloured underpaintings can also be used. The outcome depends on the transparency and colour of the glaze, the underlying passage and the overall layer structure.
Does using professional-grade paint automatically improve painting quality?
No. Paint formulation can affect pigment strength, handling, transparency and other material properties, but accurate values, sound drawing and disciplined brushwork still depend on the artist’s decisions. Suitable materials support technical control; they cannot replace it.
How can a painter tell whether a technique has been genuinely learned?
A useful test is to reproduce the effect on a new subject or under slightly changed conditions without following every step of the original demonstration. The painter should be able to explain the intended result, identify the variables involved and correct mistakes through diagnosis rather than random experimentation. Consistent, deliberate performance is more informative than one successful attempt.